


Today, two ways to put together a specific type of mini-zine—an 8-page cut-fold-&-glue apparatus you can make on letter paper using any printer on hand. These are:
- Method 1: a word processor, and
- Method 2: whatever design-y software you like & a free web-based imposer.
But first: ↓
Why might you want to make a zine?
- For ‘networking’ or other events, it is useful to have a zine on hand to give to people instead of a business card (dated) or nothing at all (the default). Share something relevant, personal, and provocative, as well as your contact info.
- For in-person facilitated events, making a customized zine helps keep everyone on the same page. Laying out facilitation instructions as well as working/writing space helps guide participants through an activity. It also eases your job as facilitator by reducing explanation and grounding group work in a defined, page-by-page progression: e.g. you can ask everyone to turn to a specific page and keep things moving along. I’ve found that participants appreciate having something that encloses the entire activity. For those who want to read ahead or worry about structure or timing, the zine satisfies. It is also a signal that you take things seriously. People will notice that you created a custom zine for this specific gathering, and printed and folded the right number of them. This does not take long to do, but makes an impression.
- Instead of a plain old handout for a presentation. It’s more fun to flip through a zine than flap a single sheet of paper. You also get to make some choices about structure and organization of the material. At the end of a talk, zines tend to go into pockets or bags while handouts are discreetly dropped into the trash.
Method 1: a word processor
This is a simple but annoying method. Start with a ready-made template for your word processor of choice, and then fill in the blanks to lay out your zine. Here’s an example in Apple Pages, using these wonderful templates from Jess Driscoll:
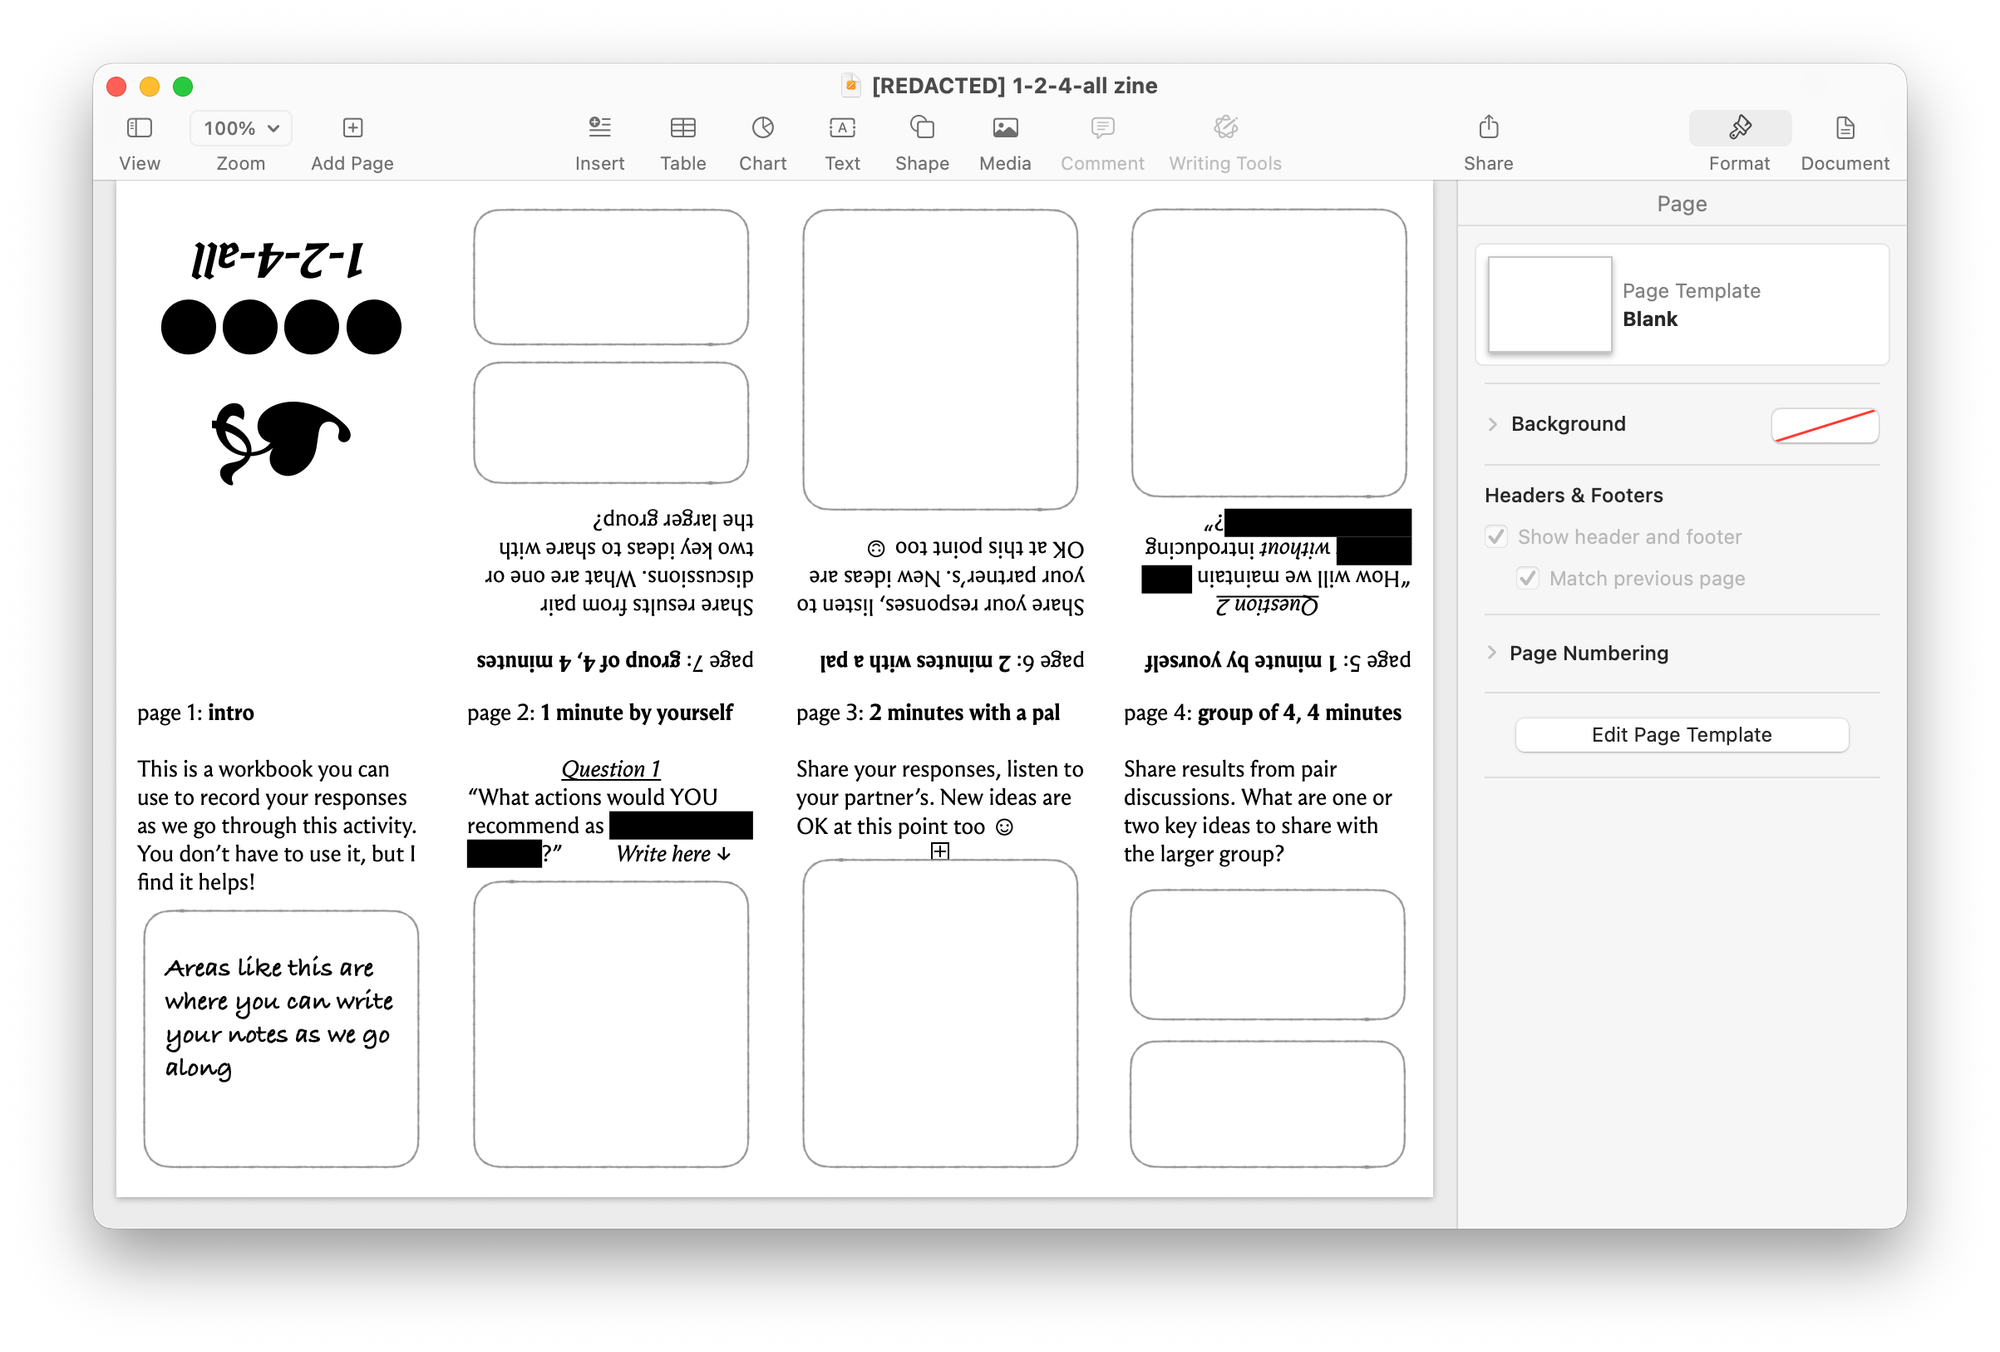
What you may detect in the screenshot is that laying out pages 5 through 8 in this method is comically irritating. The advantage is that it’s simple to do: fill in and print. Word processing upside-down is possible but not recommended. As a result, I prefer the next method instead.
Method 2: whatever design-y software you like & a free web-based imposer
This method uses delphitools’ amazing online zine imposer to lay your zine out for printing. Specifically, the tool takes a set of appropriately-sized individual pages and gives you a printer-ready PDF in a layout similar to what you saw in method 1.
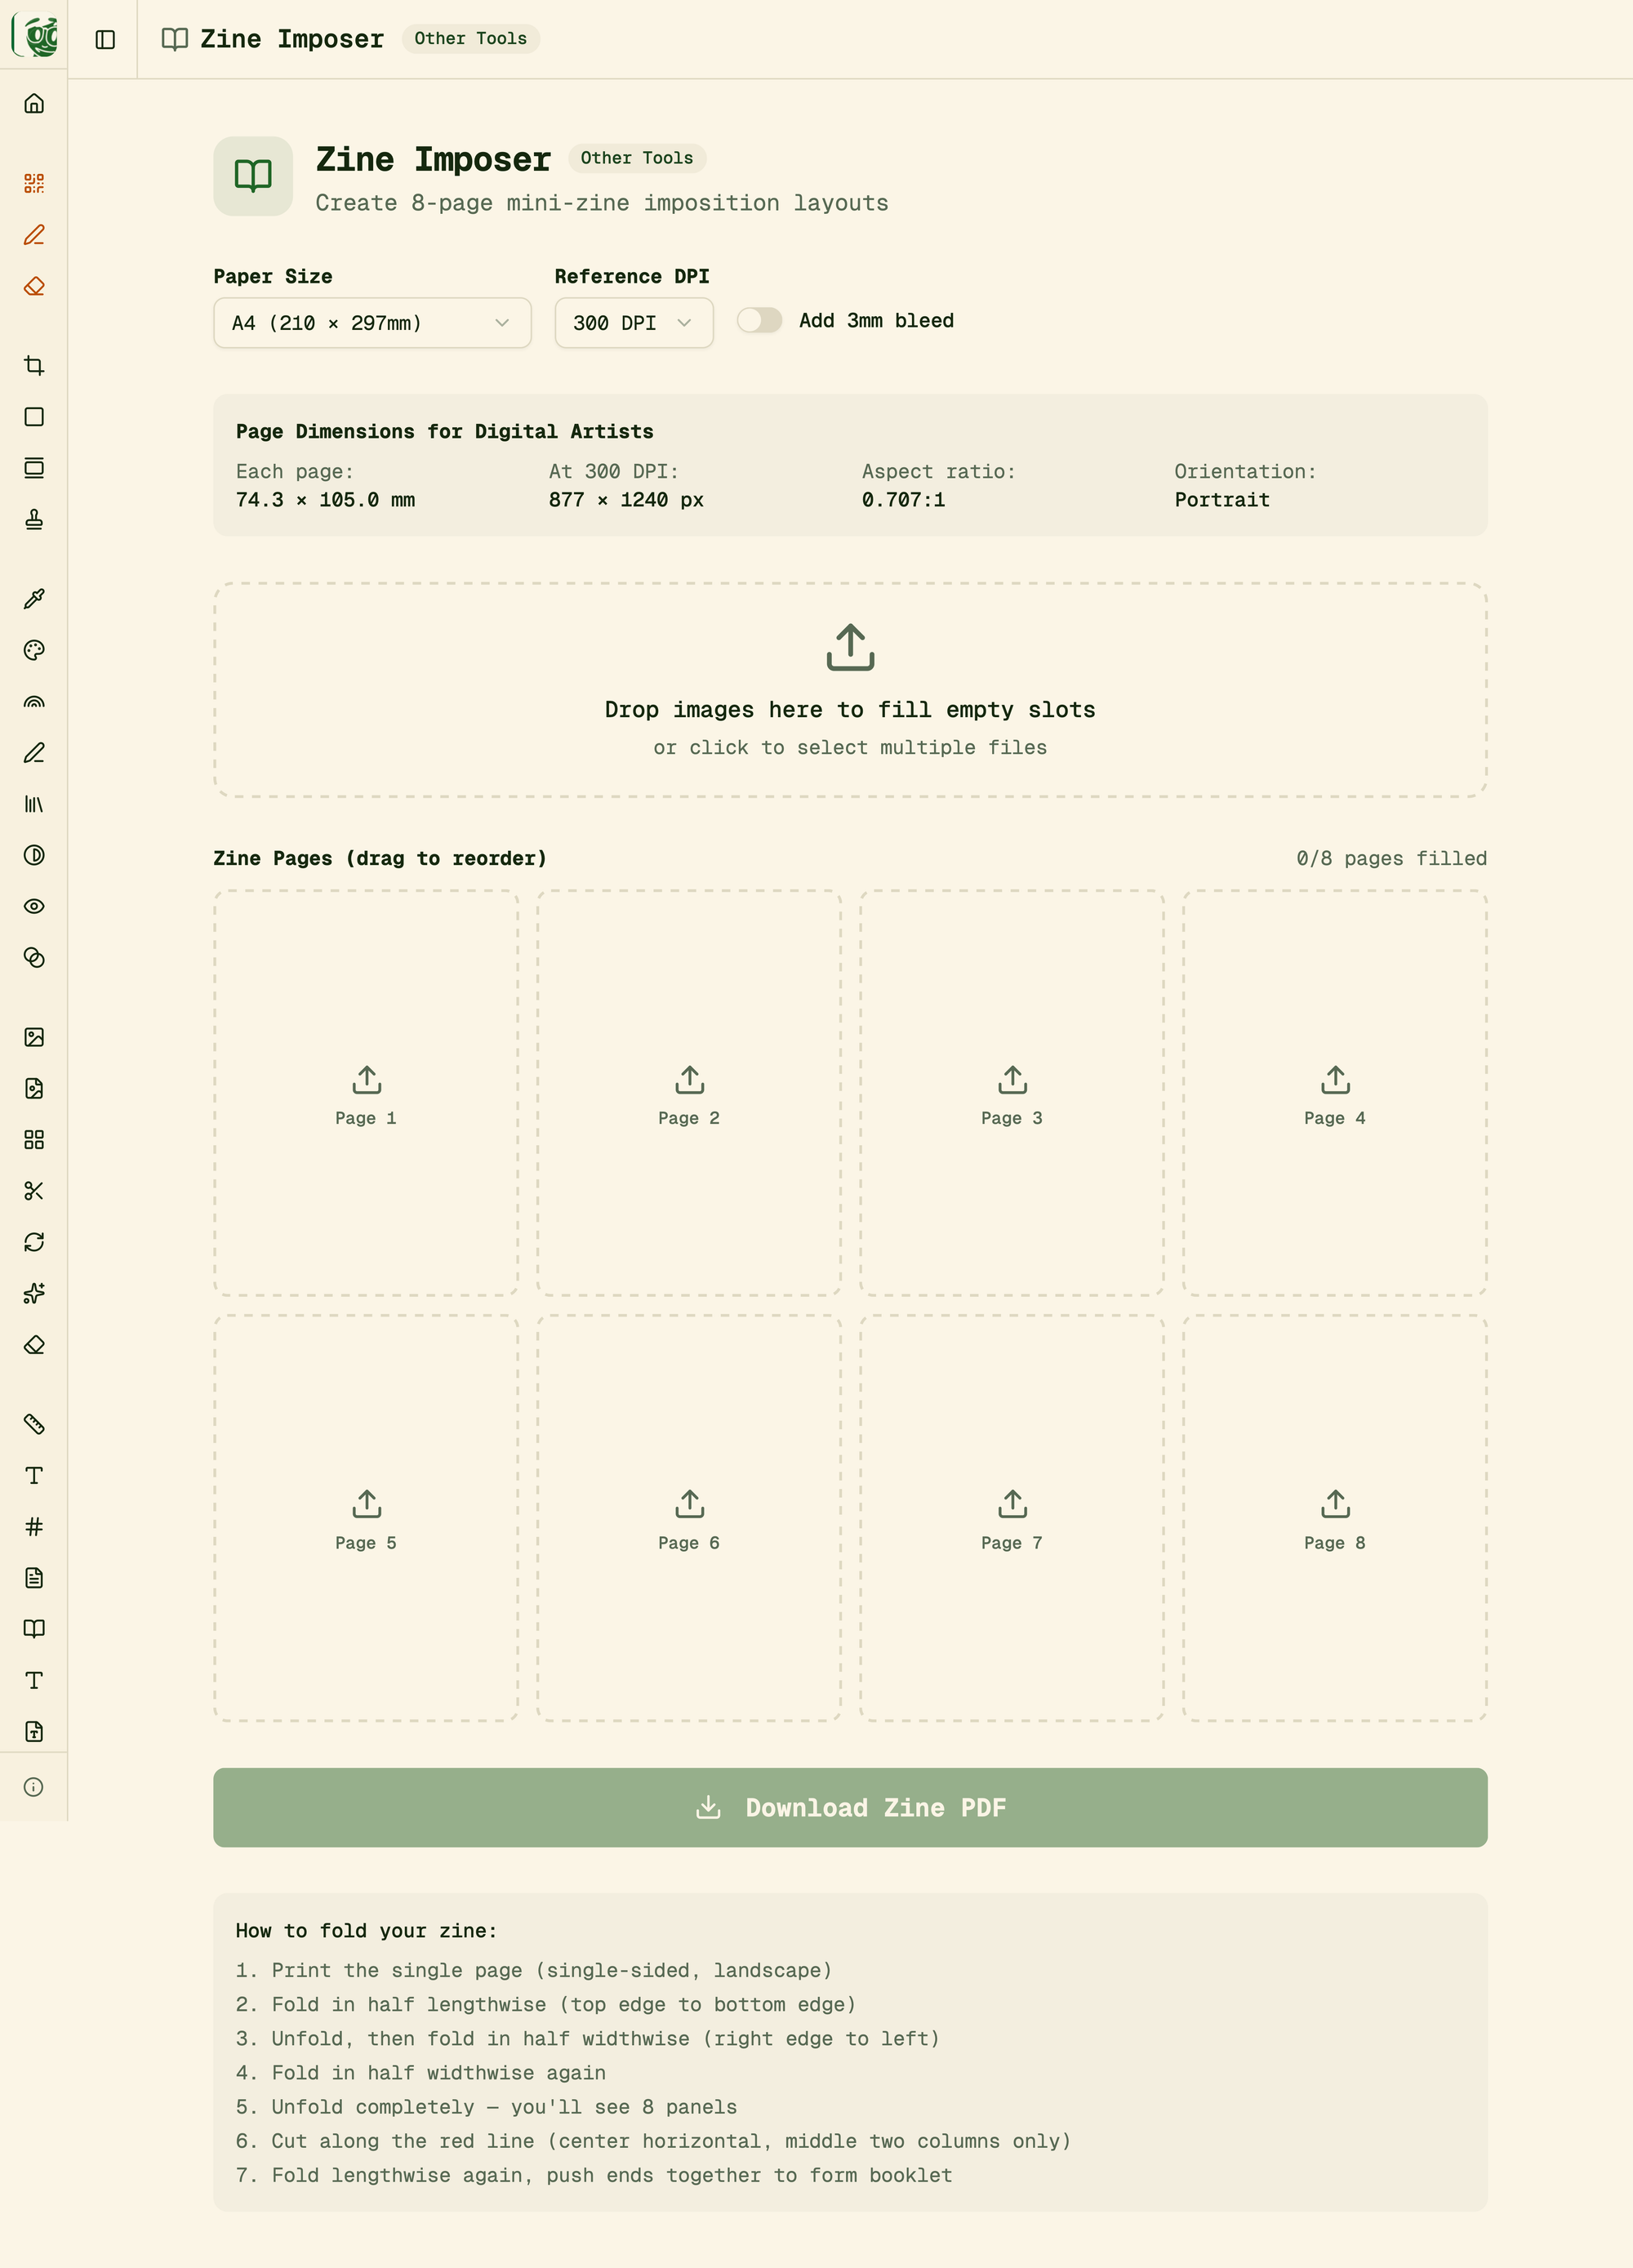
Use this thing by first selecting your paper size and then noting the dimensions it gives you for the zine pages. Next, in your software of choice, set your page size to these dimensions, and begin. You’ll want to create 8 pages, including front and back cover, and then export them as images to pull back into the zine imposer.
Options here include Keynote or other presentation software—or pretty much anything that can lay out images and text on pages.
I use Canva, where it’s simple to create pages at the right size and adhere to whatever aspects of the style guide seem important at the time. My only advice is to get the physical size of the page onscreen to roughly match what it’ll look like in print. Given Canva and my particular combination of hardware, that ends up being a 33% zoom.
If it seems like this section is a glorified link to the zine imposer, you’re right. It’s a great tool (and part of a larger collection of web-based goodies worth investigation).
What to put in the zine
Here are a few places to look for starting points or inspiration:
- I’ve zine-ified various templates and handouts from my own downloads page. You might have a similar collection to work from.
- Dan Klyn and colleagues have a great zine introducing their BASIC framework. (There’s also a video where Dan shows you how he prints and folds the things.)
- For facilitated gatherings, use a step-by-step approach as shown in the method 1 example above. Take the instructions you’d project or write onto a whiteboard and put them into the zine.
If you want to put your contact information on the back page, use a QR code generator. Point it to your web site, a social media profile, or newsletter sign-up page. Make sure you list the exact page it’ll take someone to and what they’ll find there.
I’ll send you one
I’ve resisted putting PDFs of any zines online, preferring to keep it somewhat analog. But I’ll happily send you one—let me know where to send it.